Designating Self Scheduling Units
For units and the positions and employees they contain to be active for self scheduling, they must be designated on the Self Scheduling Setup window of the Configuration menu. In many organizations, staff in only one or two units may require the ability to self schedule. For example, nurses who make home care visits may require the flexibility offered by self scheduling so that they can place themselves on evening or weekend shifts whenever necessary.
To designate a self scheduling unit
- Open the Configuration menu, and then the Self Scheduling Setup window.
- Click Add.
The Add Details dialog opens.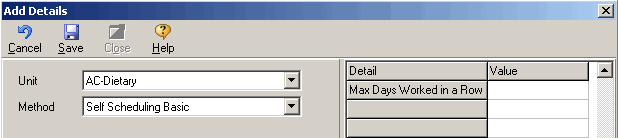
- Select a unit (Org Detail) from the Unit list box.
Only units that you have designated for self scheduling should be added on the Self Scheduling Setup window. Any units added here and all of the positions they contain will automatically have self scheduling enabled.Note! Self scheduling units cannot have more than one open ended template defined at any given time.
- Leave the Method list box at the default Self Scheduling Basic selection.
At the present time, only one method is available. - Enter a number in the value field beside the Max Days Worked in a Row detail.
When plotting shifts, a member of the unit will be prevented from selecting more than the specified number of consecutive days, for example, if an employee is scheduled to work Monday to Friday and the Max Days Worked in a Row value is set to five, the system will prevent them from selecting a Saturday shift unless they book off one of their regular Monday to Friday shifts.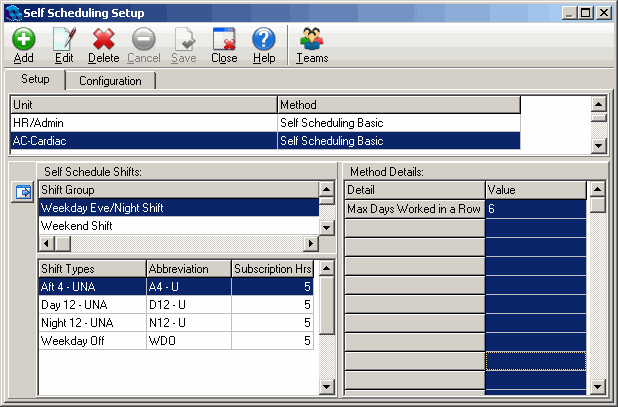
- Click Save.
- Repeat the previous steps to add additional units.
The unit you added now appears in the Unit pane on the Setup tab. However, you still need to attach shifts to the unit.
Note! If, when you click Save, an information dialog appears notifying you that the unit is associated with more than one open end-dated schedule template, you will need to end date all but one of the open ended templates.
To end date schedule templates
- Open the Configuration menu, and then the Schedule window.
- Click the Template button.
- On the Load Schedule Templates dialog that opens, select a unit and an open ended template, and then click OK.
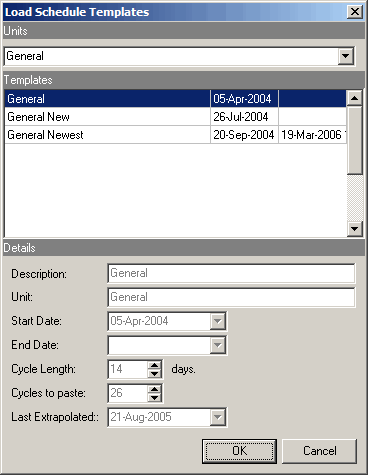
- On the schedule template that opens, click the Template Properties button

- On the Edit Schedule Templates dialog, enter an End Date, or click the End Date drop-down arrow to select the Last Extrapolated date.
- Click OK.