Login Audit History
Security is an important consideration in any web based application. The Login Audit History feature in Quadrant Self Service allows Administrators to view everyone who has logged onto the site and when, no matter what their role.
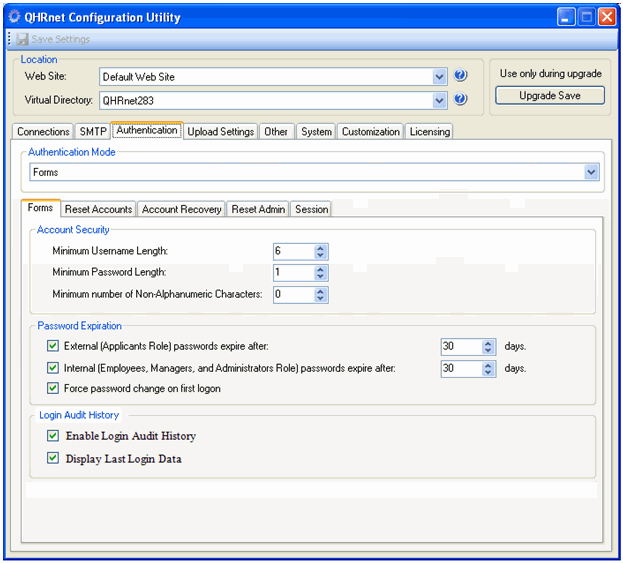
Quadrant Self Service is pre-configured for Login Audit History, but only Administrators have access to the Administrator menu item to open the Login Audit History page. Two check boxes on the Quadrant Self Service Configuration Utility must be selected during setup in order to activate the login history functionality.
To activate audit history in the Configuration Utility
- Run the Configuration Utility that is included in the package sent with Quadrant Self Service.
- On the Forms tab, select the Enable Login Audit History, and Display Last Login Data check boxes.
- Click Save Settings.

To view login history
- Log on to Quadrant Self Service as an Administrator.
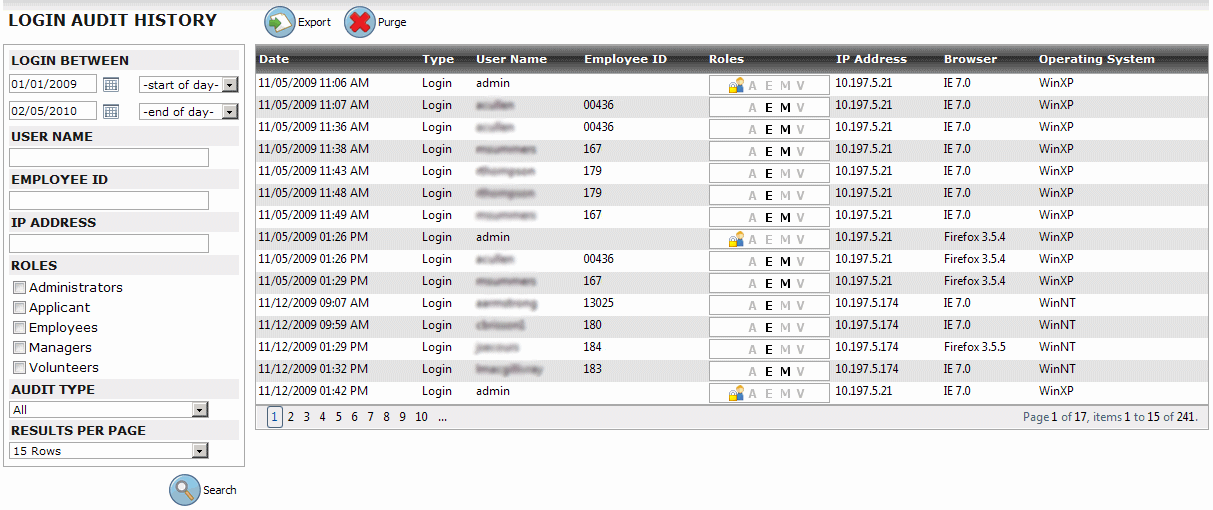
Only Administrators have access to the Login Audit information. - Select the Admin menu item, and then click Login Audit History on the shortcut menu that appears. The Login Audit History page opens. There are several filtering options at the left side of the page.
- Select a date range from the Login Between boxes to view all of the users who have logged into the system during the specified period.
- Click Search to view the results.
- To search for a specific user, enter their user name, and then click Search.
If you want to view their login history for a specified period, enter a date range. - To view the login history for a specific IP address, enter the address in the IPAddress box, and then click Search.
You also have the option of specifying a date range when viewing the login history for an IP Address. You can also view login history only for selected roles. Again, you have the option of specifying a date range. The results provide information such as the date, user name and ID, role, and IP address of users who have logged on to the system. The icon in the Roles column indicates that a user is also an Administrator.

To export login audit data
- Click the Export button.
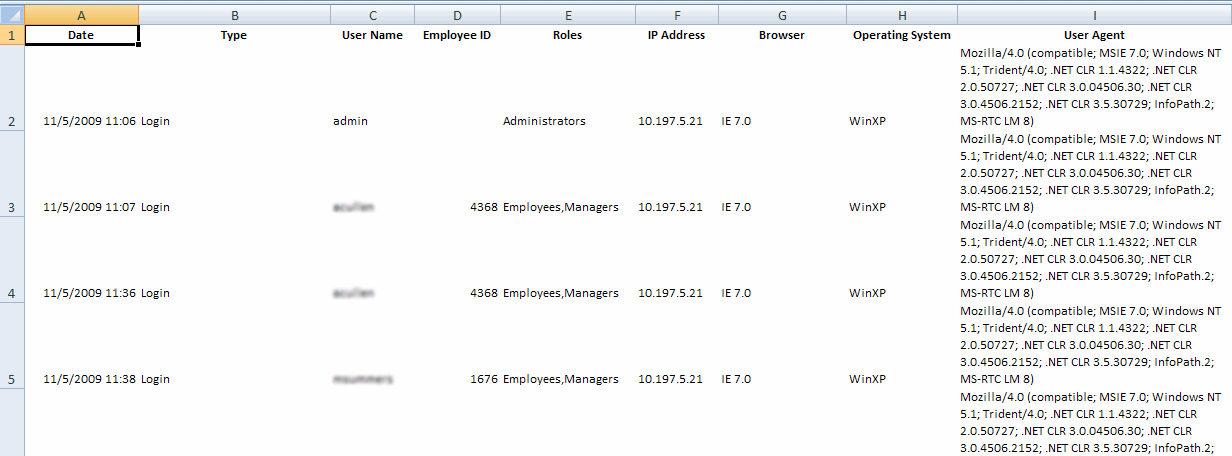
A File Download dialog opens. - Click Open to view the results immediately, or click Save to save the spreadsheet to your computer.
- If you elected to save the spreadsheet, browse to a location on the Save As dialog that opens. The spreadsheet is named LoginAuditHistoryExport.xls by default.
- Click Save.
- Click Open on the Download Complete dialog.

After you've had a chance to view the login history, you can purge some, or all, of the results.
To purge audit history records
- Click the Purge button.
The Purge Login Audit History dialog opens. - Select a date, and any records prior to that date will be deleted when the Purge button is clicked. The default date is 90 days prior to the current date.
- If you want to purge records prior to a specific time on the purge date, make a selection from the Time list box, or leave it at the default Start of Day setting.

- Click Purge.


